Replacing a Keyless Vehicle Module (KVM) or Body Control Module (BCM) on a modern Jaguar or Land Rover is not a simple plug-and-play operation. These modules store critical security data, vehicle configuration parameters, and immobiliser synchronisation information that must be correctly initialised before the vehicle will start or function normally. This guide explains what KVM and BCM modules do, why virgin files are often necessary, and how to program replacement modules using JLR SDD or Pathfinder diagnostic software.
What Is the KVM and Why Does It Matter?
The Keyless Vehicle Module (KVM) is the central security hub for passive entry and start systems on Jaguar and Land Rover vehicles from approximately 2012 onwards. It communicates with the key fobs via low-frequency (LF) antennas located around the vehicle and high-frequency (HF) return signals from the key. The KVM validates key authenticity, authorises the ignition sequence, and manages the immobiliser handshake with the engine control unit.
When a KVM fails, the symptoms are unmistakable: the vehicle will not recognise the key, the passive entry system ceases to function, and in many cases the engine will not crank. Common failure modes include internal water ingress, voltage spikes from a failing battery, and EEPROM corruption. Because the KVM is married to the vehicle during production, a second-hand module from a donor vehicle cannot simply be installed without reconfiguration.
What Is the BCM and Its Role?
The Body Control Module (BCM) manages the vehicle's electrical architecture, controlling everything from interior lighting and window operation to the central locking and alarm systems. On JLR vehicles, the BCM works in tandem with the KVM to manage security authorisation. It stores the vehicle configuration code (CCF) and communicates with multiple modules across the high-speed and medium-speed CAN buses.
BCM failures often manifest as erratic electrical behaviour: windows that operate intermittently, central locking that responds randomly, or a complete loss of communication with diagnostic tools. Because the BCM contains the vehicle's build configuration, replacing it requires not only a virgin file but also a full reconfiguration of the CCF to match the original build specification.
What Is a Virgin File?
A virgin file is a clean, unmarried calibration file that resets a replacement module to a factory-blank state. When a module is installed on a vehicle at the factory, it is "married" to that specific VIN and security network. A used module retains this marriage, meaning it will refuse to communicate with a new vehicle. The virgin file erases the previous marriage data, allowing the module to be programmed as if it were fresh from the supplier.
Virgin files are not generic. Each file must match the exact part number, hardware revision, and software level of the module being programmed. Using an incorrect virgin file can result in a permanently bricked module, so precise identification is essential.
Common JLR KVM and BCM Part Numbers
The table below lists frequently requested virgin files for JLR KVM and BCM modules. If you are unsure which part number corresponds to your module, remove the module and inspect the label carefully before ordering.
| Part Number | Module Type | Typical Applications | Virgin File Status |
|---|---|---|---|
JPLA-19H440-DE |
KVM | Range Rover L405, Range Rover Sport L494 | Available |
FK72-19H440-BH |
KVM | Discovery Sport L550, Evoque L538 | Available |
FK72-19H440-BF |
KVM | Discovery Sport L550, Evoque L538 | Available |
FK72-19H440-BD |
KVM | Discovery Sport L550, Evoque L538 | Available |
FK72-19H440-AF |
KVM | Discovery Sport L550, Evoque L538 | Available |
DPLA-19H440-BB |
KVM | Defender L663, Discovery L462 | Available |
DPLA-19H440-BF |
KVM | Defender L663, Discovery L462 | Available |
FK72-14C104-BF |
BCM | Discovery Sport L550, Evoque L538 | Available |
FK72-14C104-BC |
BCM | Discovery Sport L550, Evoque L538 | Available |
FK72-14C104-BA |
BCM | Discovery Sport L550, Evoque L538 | Available |
FK72-14C104-AD |
BCM | Discovery Sport L550, Evoque L538 | Available |
If your part number is not listed above, contact our team with a clear photograph of the module label. We maintain an extensive catalogue of virgin files and can source files for many additional part numbers within 24 to 48 hours.
When Do You Need a Virgin File?
You should consider a virgin file in the following scenarios:
- Module replacement with a used part: Any second-hand KVM or BCM must be virginised before it will accept a new vehicle configuration.
- Module replacement with a new OEM part: Some new modules are supplied in a "blank" state but still require the correct initialisation file to match the vehicle's build level.
- Corruption or failed update: If a programming session is interrupted by a power loss or communication fault, the module may require a virgin file to recover.
- Security reset after theft recovery: Vehicles recovered after theft often require a full security reset, including KVM replacement and re-pairing of all keys.
Programming Tools: SDD vs Pathfinder
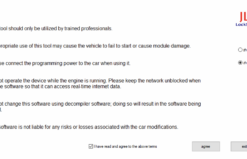
JLR provides two primary diagnostic platforms for module programming: SDD (Symptom Driven Diagnostics) and Pathfinder. The choice depends on the vehicle model year.
SDD covers vehicles from 2005 through to approximately 2016, including the XF X250, XJ X351, Discovery 4, Range Rover L322, and Range Rover Sport L320. It operates offline for most programming tasks and uses a local database of calibration files.
Pathfinder is required for 2017 model year onwards, including the L663 Defender, L462 Discovery, I-Pace, and X260 XF. Pathfinder requires a live internet connection to the JLR server for authentication and file download. It uses the TOPIx Cloud Diagnostic Device Agent (DDA) to manage communication between the vehicle and JLR's backend systems.
Both platforms require a J2534-compatible VCI (Vehicle Communication Interface). Popular options include the MongoosePro JLR, DrewTech CarDAQ, and Bosch KTS. The JLR VCI for SDD is the most cost-effective choice for independent technicians and remains fully supported by both SDD and Pathfinder.
Step-by-Step Replacement and Programming Guide
The following procedure applies to both KVM and BCM replacement. Always ensure the vehicle battery is healthy and ideally connected to a stabilised battery charger before commencing programming. Voltage drops below 12.0 volts during flashing can render a module permanently unusable.
Step 1: Identify Your Module Part Number
Remove the faulty module from the vehicle and record the full part number, hardware level, and serial number printed on the label. The part number is typically formatted as XX##-#####-XX. Take a photograph of the label for reference. This information is essential for sourcing the correct virgin file and confirming compatibility with your vehicle's build level.
Step 2: Source the Correct Virgin File
Order a virgin file that matches your exact part number. SX-CAN Engineering Tool for all common JLR KVM and BCM modules, priced at £49 per file. Each file is delivered as a compressed download within minutes of purchase. If your part number is not listed, submit an enquiry and we will confirm availability within one working day.
Step 3: Connect the Diagnostic Interface
Connect your J2534 VCI to the vehicle's OBD-II port, located beneath the dashboard on the driver's side. Connect the VCI to your laptop via USB or Ethernet. Ensure the laptop battery is charged or connected to mains power. Disable sleep mode and power-saving settings on the laptop before starting the programming session.
Step 4: Install the Replacement Module
Fit the replacement KVM or BCM into the vehicle, ensuring all multi-pin connectors are fully seated and locked. Do not power the ignition yet. Some modules require a virgin file to be loaded before the first power cycle; others can be powered on and then programmed. Consult the technical notes supplied with your virgin file for the correct sequence.
Step 5: Program the Virgin File
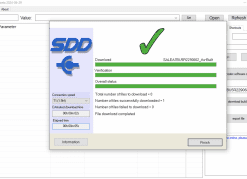
Launch SDD or Pathfinder and perform a full vehicle identification using the VIN. Navigate to the programming section for the target module. Select the option to load a custom calibration file or virgin file, and browse to the file you downloaded. Follow the on-screen prompts precisely. The flashing process typically takes between 15 and 45 minutes. Do not interrupt the process, close the laptop, or disconnect the VCI until the software confirms successful completion.
Step 6: Pair the Keys and Validate System Operation
After the module has been successfully programmed, navigate to the key-pairing or security-reset routine within SDD or Pathfinder. Present each key fob as instructed by the software. Some systems require you to press the lock or unlock button during the pairing process; others simply need the key to be within the passenger compartment. Once pairing is complete, verify the following functions:
- Remote lock and unlock via key fob buttons
- Passive entry (touching the door handle to lock/unlock)
- Start authorisation (foot on brake, press start button)
- Immobiliser status (no security warning lamp on the dashboard)
- Alarm set and disarm behaviour
Common Issues and Troubleshooting
Even experienced technicians encounter issues during KVM and BCM programming. The following table outlines common problems and their solutions.
| Symptom | Likely Cause | Solution |
|---|---|---|
| "Module not recognised" after installation | Incorrect virgin file or hardware mismatch | Verify part number and re-order the correct file. Do not attempt to reflash with the wrong file. |
| Programming session fails at 10% | Voltage drop or poor VCI connection | Connect a battery maintainer, check USB cable quality, and try a different USB port. |
| Keys pair but vehicle will not start | Immobiliser sync not completed | Run the immobiliser alignment routine in SDD/Pathfinder. Check for DTCs in the ECM. |
| Central locking works but alarm triggers randomly | BCM configuration mismatch | Verify CCF settings match the original build specification. Update the CCF if the vehicle specification has changed. |
| Passive entry inoperative after KVM swap | LF antenna calibration not performed | Run the LF antenna calibration routine in the diagnostic software. Check antenna wiring for damage. |
| Pathfinder reports "subscription expired" | JLR account or licence issue | Verify your Pathfinder subscription is active. Ensure the DDA is correctly installed and synchronised. |
Virgin File vs Module Cloning
Some technicians offer module cloning as an alternative to virgin file programming. Cloning involves reading the EEPROM or Flash memory from the original module and writing it directly into a replacement. This approach has advantages and limitations.
Cloning is faster because it avoids the need to re-pair keys or reconfigure the CCF. However, it requires specialised EEPROM programming equipment and can be risky if the original module is partially corrupted. Cloning also does not work if the original module is completely dead or physically damaged, as there is no data to extract.
Virgin file programming is the recommended approach for most workshops because it is reliable, repeatable, and does not require exotic equipment. It also produces a clean installation that aligns with JLR's official programming procedures. If the original module is functional, cloning can be a useful shortcut, but for a permanent repair, virgin file programming followed by full key pairing and CCF validation is the gold standard.
Professional Support and Remote Coding
If you do not have access to SDD or Pathfinder, or if you are unsure about any step of the process, SX-CAN offers remote coding services. Our technicians can guide you through the hardware connection, perform the programming session remotely via AnyDesk or TeamViewer, and ensure your keys are correctly paired. Remote coding sessions are typically completed within 60 to 90 minutes and include full technical support.
We also supply JLR SDD, J2534 cables, and a complete range of SX-CAN Engineering for same-day download. Every file is verified against the latest JLR calibration database to ensure compatibility and reliability.
Conclusion
KVM and BCM replacement on Jaguar and Land Rover vehicles is a technical procedure that demands the correct tools, the correct virgin file, and careful attention to detail. By following the steps outlined in this guide, independent technicians and specialist garages can perform these repairs confidently and cost-effectively. Always verify part numbers, maintain stable battery voltage during programming, and validate every function before returning the vehicle to the customer.
For further reading, explore our guides on 007 Splash Screen activation and Adaptive Cruise Control activation, or visit our JLR SDD resource page for comprehensive diagnostic software information.