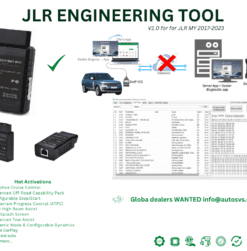
Remote coding has transformed how Jaguar Land Rover owners and workshops access dealer-level programming. Instead of travelling to a specialist garage or waiting weeks for an appointment, you can now have your vehicle coded, configured, and activated from the comfort of your own home or workshop. The technician connects to your laptop remotely, takes control of your diagnostic software, and performs the exact same procedures they would perform if sitting in the passenger seat. At SX-CAN, we have completed thousands of remote coding sessions for customers across the UK, Europe, North America, and Australia. This guide distils everything we have learned into a clear, actionable process that prepares you for a successful session and eliminates the uncertainty that many first-time customers feel.
What Is JLR Remote Coding?
Remote coding is a service where a professional JLR technician programmes your vehicle via an internet connection. You provide the physical connection to the vehicle (a VCI cable plugged into the OBD-II port and a laptop), and the technician provides the expertise and software access. Using remote desktop software such as AnyDesk or TeamViewer, the technician connects to your laptop, launches the diagnostic application, and performs the required coding, programming, or activation procedures while you observe.
The technology behind remote coding is straightforward but requires careful preparation. The technician does not connect directly to your vehicle over the internet; rather, they connect to your laptop, which is physically connected to the vehicle. This means the vehicle communication is local and reliable, while the technician's expertise is delivered remotely. The model works because modern internet connections are fast enough to support real-time remote desktop sessions with minimal latency.
Remote coding is not a workaround or a hack. It uses the same genuine JLR diagnostic software (SDD or Pathfinder) and the same licensed procedures that dealerships use. The only difference is the physical location of the technician. At SX-CAN, all our remote coding sessions are performed by certified technicians using fully licensed software and legitimate OEM procedures. We do not use cracked software, unauthorised shortcuts, or risky techniques that could damage your vehicle's electronics.
Many customers are surprised to learn that remote coding has been practised in professional automotive circles for well over a decade. Major diagnostic equipment manufacturers have offered remote support capabilities since the early 2010s, and the proliferation of broadband internet and reliable remote desktop software has made the process accessible to independent garages and private owners alike. What was once a premium service reserved for dealerships is now available to anyone with a compatible vehicle, the correct hardware, and a stable internet connection.
How Remote Coding Works
The remote coding process can be broken down into three conceptual layers: the physical layer, the software layer, and the communication layer. Understanding each layer helps you prepare correctly and troubleshoot if something goes wrong.
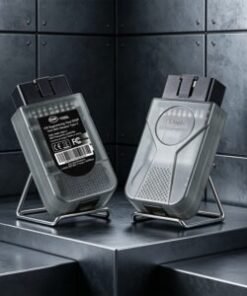
The physical layer is the connection between your vehicle and your laptop. You need a compatible VCI device (such as the JLR VCI for SDD for SDD or the DA-DoIP VCI for Pathfinder), a USB cable, and the vehicle's OBD-II port. The VCI translates between the vehicle's CAN network and your laptop's USB port. Without this physical connection, no remote coding is possible.
The software layer consists of the diagnostic application (SDD or Pathfinder) running on your laptop, along with the correct drivers and licence activation. The software must be installed, activated, and configured before the session begins. The technician cannot install software for you during a remote session because installation often requires reboots and driver confirmations that interrupt remote desktop connections.
The communication layer is the remote desktop connection between your laptop and the technician's workstation. We typically use AnyDesk because it is lightweight, reliable, and does not require complex firewall configurations. TeamViewer is an alternative for customers in regions where AnyDesk is restricted. The connection is encrypted end-to-end, and the technician only has access for the duration of the session. You can disconnect at any time by closing the remote desktop application.
The 8-Step Remote Coding Process
Our remote coding service follows a proven 8-step process that has been refined through thousands of successful sessions. Each step is designed to minimise risk, maximise efficiency, and ensure you know exactly what is happening at every stage.
Step 1: Acquire Your Remote Coding Device
Before booking a session, you need the correct hardware and software. For vehicles from 2005-2016, you need JLR SDD and a J2534 VCI such as the Mongoose JLR Cable. For 2017+ vehicles, you need JLR Pathfinder and a DoIP-capable VCI. If you are unsure which you need, contact our team with your VIN and we will advise you. We also offer complete remote coding kits that include everything pre-configured and ready to use.
Step 2: Schedule Your Coding Session
Book your session through our contact form or by email. We schedule sessions at times that suit your timezone and availability. Most sessions take between 1 and 3 hours depending on the complexity of the work. We recommend booking at least 48 hours in advance to allow time for preparation and any pre-session checks.
Step 3: Preparation for the Coding Session
Preparation is the most critical factor in remote coding success. Your vehicle battery must be fully charged or connected to a battery maintainer. Voltage must remain above 12.4 volts throughout the session; low voltage is the most common cause of programming failures. Ensure your laptop is connected to mains power, not running on battery. Position your vehicle in a location with stable internet. If using WiFi, test the connection strength at the vehicle's location. Download and install AnyDesk (or TeamViewer if requested) but do not launch it until the technician instructs you.
Step 4: Connect the Hardware
At the scheduled time, plug the VCI into your vehicle's OBD-II port (located under the dashboard on the driver's side) and connect the VCI to your laptop via USB. Turn the vehicle ignition to position II (ignition on, engine off). Do not start the engine. Verify that the VCI status LED shows a solid or flashing connection indicator. If your VCI has no LED, check Device Manager to confirm the driver is recognised.
Step 5: Laptop Setup
Launch the diagnostic software (SDD or Pathfinder) and verify that it can identify the vehicle. Run the self-test if available. Close all unnecessary applications on your laptop to free up memory and CPU resources. Disable sleep mode and screen savers. Ensure your laptop will not update Windows or restart automatically during the session.
Step 6: Install AnyDesk or TeamViewer
If you have not already installed remote desktop software, download it now from the official website. AnyDesk is our preferred choice because it requires no installation for portable use and has excellent performance on slower connections. If you are security-conscious, note that AnyDesk uses TLS 1.2 encryption and generates a unique session ID for every connection.
Step 7: Share the Connection Code
When the technician is ready, they will contact you via phone, WhatsApp, or email. Launch AnyDesk and provide your AnyDesk ID and the session password. The technician will connect to your laptop. You will see their cursor moving on your screen as they work. You remain in control: you can watch, ask questions via chat or phone, and terminate the session at any time by closing AnyDesk.
Step 8: Observe and Relax
The technician will perform the coding work while you observe. Depending on the procedure, they may ask you to perform simple actions such as pressing the brake pedal, turning the steering wheel, or cycling the ignition. Follow their instructions precisely. Do not touch the laptop or vehicle controls unless asked. When the work is complete, the technician will run verification tests, save any reports, and disconnect. You will receive a summary of the work performed.
Safety Considerations
Vehicle programming is not without risk. A failed programming session can corrupt an ECU, leaving the vehicle inoperable until the module is replaced or recovered. Remote coding does not eliminate this risk, but proper preparation and professional execution minimise it significantly. The following safety measures are non-negotiable for every remote coding session.
Battery Voltage: Programming draws significant current from the vehicle battery. If voltage drops below 12.0 volts during a flash procedure, the programming can fail and brick the module. Always use a battery maintainer or charger set to 13.8 volts during extended sessions. Do not rely on the alternator by running the engine, as voltage fluctuations can be just as damaging as low voltage.
Internet Stability: Remote desktop requires a stable connection. If the internet drops during a critical programming phase, the technician may lose control at the worst possible moment. Use a wired Ethernet connection if possible. If you must use WiFi, ensure strong signal strength and minimal interference. Do not stream video or download large files on the same network during the session.
Software Legitimacy: Only use genuine, licensed diagnostic software. Cracked or pirated software may work for basic reading but often fails during programming, and it can contain malware that compromises your laptop. At SX-CAN, we only work with customers using legitimate software, both for your protection and ours.
Physical Environment: Park your vehicle on level ground with the parking brake applied. Ensure adequate ventilation if the engine needs to run. Keep children and pets away from the vehicle and laptop during the session. Have a fire extinguisher accessible, though programming fires are extremely rare.
What Can Be Done Remotely
Remote coding covers a wide range of JLR programming and configuration tasks. The most common services we provide are listed below.
| Service | Description | Typical Duration | Remote Possible? |
|---|---|---|---|
| Hidden Feature Activation | Unlock comfort access, auto-lock, ambient lighting, etc. | 30-60 min | Yes |
| Module Programming | Flash new firmware to ECUs via SDD or Pathfinder | 1-3 hours | Yes |
| CCF Editing | Modify vehicle configuration files | 45-90 min | Yes |
| KVM Virginising | Virginise KVM modules for key programming | 1-2 hours | Yes |
| BCM Programming | Body control module configuration and updates | 1-2 hours | Yes |
| 007 Splash Screen | Activate the James Bond startup screen on L663 | 30 min | Yes |
| Adaptive Cruise Control | Enable ACC on compatible vehicles with correct hardware | 1-2 hours | Yes |
| Physical Hardware Installation | Install sensors, cameras, or control modules | N/A | No |
Note: Remote coding requires that your vehicle already has the necessary hardware installed. Software cannot enable features that depend on missing physical components.
What Cannot Be Done Remotely
Remote coding is powerful but not all-encompassing. Certain tasks require physical presence and cannot be performed remotely. Understanding these limitations helps set realistic expectations and prevents wasted booking fees.
Any task requiring physical access to the vehicle's interior or exterior components cannot be done remotely. This includes installing cameras, wiring harnesses, control buttons, or sensors. If you want to add a feature that requires new hardware (such as a surround camera system or heated steering wheel), the hardware must be installed by a local technician before remote coding can activate it.
Tasks requiring immobiliser-related security procedures sometimes require in-person verification. While many key programming and KVM procedures can be done remotely, some security-sensitive operations require the technician to verify ownership documents physically. This varies by region and vehicle model.
Recovery from severe programming failures may require in-person intervention. If a module is corrupted during a remote session and cannot be recovered through software, the vehicle may need to be transported to a workshop for bench programming or module replacement. This scenario is rare when proper preparation is followed, but it is a possibility that all customers should understand.
Finally, some older vehicles with pre-CAN bus architectures (certain pre-2005 models) cannot support remote coding because their communication protocols are too slow and unreliable for real-time remote work. These vehicles should be serviced in person at a specialist workshop.
Remote Coding Pricing
Pricing for remote coding varies based on the complexity of the work, the software required, and the time involved. At SX-CAN, we believe in transparent pricing with no hidden fees. The table below provides indicative pricing for our most common remote coding services. Exact quotes are provided after we review your vehicle details and requirements.
| Service | Price from | What's Included |
|---|---|---|
| Hidden Feature Activation | £79 | Up to 5 features, verification, documentation |
| Module Programming (SDD) | £149 | One module, calibration files, post-check |
| Module Programming (Pathfinder) | £199 | One module, online programming, TOPIX access |
| KVM Virginising | £149 | Virgin file, programming, key sync guidance |
| CCF Editing | £99 | Configuration change, backup, verification |
| 007 Splash Screen | £49 | Activation, confirmation, revert option |
| Adaptive Cruise Control Activation | £149 | Hardware check, enable, calibration |
| Remote Coding Support Hour | £79 | General diagnostics, troubleshooting, advice |
All prices exclude VAT where applicable. Discounts are available for multiple services booked in the same session. We also offer workshop partnership programmes for garages that refer regular remote coding work.
Frequently Asked Questions
Is remote coding safe for my vehicle?
Yes, when performed correctly by experienced technicians with proper preparation. The actual programming procedure is identical to what a dealership would do. The risk comes from poor preparation (low battery voltage, unstable internet) rather than the remote nature of the work itself.
Do I need to be present during the session?
You must be physically present because the technician may need you to perform simple actions such as pressing pedals or turning the ignition. You do not need to operate the laptop; the technician controls it remotely.
What happens if the internet disconnects mid-session?
If the connection drops during a non-critical phase, the technician will reconnect and continue. If the connection drops during a module flash, the programming may fail. This is why we stress the importance of a stable internet connection. In the unlikely event of a failure, we have recovery procedures for most modules, and we carry insurance for the rare cases where recovery is not possible.
Can I use my laptop while the technician is working?
No. You must not touch the laptop during the session. Any interaction from your side can disrupt the diagnostic software and cause errors. Watch the screen, ask questions via phone or chat, but do not use the keyboard or mouse.
Do you offer remote coding outside the UK?
Yes. We provide remote coding globally, subject to timezone alignment and internet connectivity. We have successfully completed sessions in Australia, the United States, Canada, the UAE, and throughout Europe. Some services require TOPIX Cloud access which may have regional restrictions, but we can advise on this during booking.
What software do I need on my laptop?
You need the correct diagnostic software for your vehicle: JLR SDD for 2005-2016 vehicles, or JLR Pathfinder for 2017+ vehicles. The software must be installed, activated, and functional before the session. We do not provide software installation during remote coding sessions. If you need help installing software, book our remote installation service separately.