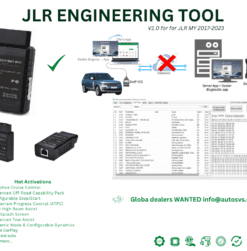
When you purchase a modern Jaguar Land Rover vehicle, you are buying hardware that is capable of far more than the factory settings suggest. From enhanced ambient lighting and comfort access to driver assistance tweaks and custom drive modes, many features are present in the vehicle's electronic architecture but simply not enabled by default. This is not a limitation of the hardware; it is a deliberate software configuration choice made by the manufacturer.
For independent workshops, mobile technicians, and knowledgeable enthusiasts, the ability to activate these hidden features represents a significant value-add. Customers are increasingly aware that their vehicles have untapped potential, and they are willing to pay for professional activation services that unlock the full specification of their cars. This guide will teach you everything you need to know to perform these activations safely, legally, and effectively.
What Is CAN Activation?
CAN activation refers to the process of enabling or modifying features within a vehicle's electronic control modules by communicating over the Controller Area Network (CAN bus). Every modern JLR vehicle contains dozens of interconnected modules that manage everything from engine behaviour to interior lighting. These modules are programmed at the factory with a configuration file that determines which features are active and how they behave.
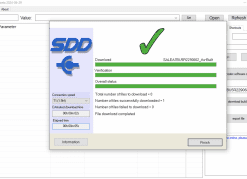
By using genuine diagnostic software such as JLR SDD or JLR Pathfinder, along with a compatible VCI interface, a technician can access these module configurations, modify them, and write the changes back to the vehicle. This process is entirely different from aftermarket retrofitting, which typically involves adding physical hardware. CAN activation works purely with software, meaning the features you unlock are already built into the vehicle; they just need to be turned on.
It is important to distinguish between CAN activation and illegal software modifications. The techniques described in this guide use official Jaguar Land Rover diagnostic tools and do not involve reverse engineering, cracked software, or unauthorised third-party tools. At SX-CAN, we only support and supply genuine OEM software, and we strongly advise against any method that could compromise vehicle safety or warranty coverage.
Common Features Available for Activation
The exact features available depend on the vehicle model, year, and the modules fitted from the factory. However, there are several categories of features that we regularly activate for customers across the JLR range. The table below provides a detailed overview of the most popular activations, which vehicles support them, and the general method used.
| Feature | Vehicle | Description | Activation Method |
|---|---|---|---|
| Comfort Access | Defender L663, Range Rover L460, RR Sport L461 | Unlock doors by approaching with key fob; lock by touching door handle | BCM configuration via Pathfinder + CCF modification |
| Ambient Lighting Pack | Defender L663, Discovery L462, Range Rover L460, F-PACE | Extended interior ambient lighting colours and zones beyond factory defaults | CJB / BCM coding with colour profile update |
| Auto Door Lock | All JLR 2016+ | Automatically lock doors when vehicle speed exceeds a set threshold | BCM configuration change in CCF Editor |
| Auto Fold Mirrors | Range Rover, RR Sport, Discovery, Defender | Fold wing mirrors automatically when locking the vehicle | BCM / door module configuration via CCF |
| Driver Memory Profiles | Range Rover L460, RR Sport L461, F-PACE | Additional memory profile slots for seat, mirror, and steering column positions | Seat module + BCM configuration via Pathfinder |
| Custom Drive Modes | Defender L663, Range Rover L460, RR Sport L461 | Unlock configurable drive modes with personalised throttle, steering, and suspension settings | TCM + PCM configuration via Pathfinder |
| Hidden Menu Access | Discovery L462, Range Rover L405, F-PACE | Enable engineering or service menus in the infotainment system | Infotainment gateway module coding |
| Terrain Response Extra Modes | Defender L663, Discovery L462 | Unlock additional off-road terrain response modes not enabled by default | PCM + TCCM configuration via CCF |
| Wireless Apple CarPlay | Range Rover L460, Defender L663, F-PACE 2021+ | Enable wireless CarPlay if the hardware supports it but software restricts it | Infotainment module update + CCF change |
| Window Close on Lock | All JLR 2016+ | Close all windows and sunroof when holding the lock button on the key fob | BCM configuration via CCF Editor |
Note: Availability of specific features depends on the exact build specification of your vehicle. Some features require supporting hardware (e.g., additional LED strips for ambient lighting) even if the module is present. Always verify hardware compatibility before offering activation services to customers.
Step-by-Step Activation Process
While the exact procedure varies depending on the vehicle and the specific feature, the general activation process follows a consistent five-step methodology. Mastering this workflow will allow you to approach any JLR activation with confidence and professionalism.
Step 1: Prepare Your Tools and Vehicle
Before beginning any activation work, ensure you have the correct diagnostic software installed and licensed for the target vehicle. For pre-2017 models, this means JLR SDD; for 2017+ models, you will need JLR Pathfinder. You will also need a compatible VCI interface, a fully charged laptop, and a stable internet connection if online programming is required.
Position the vehicle in a well-ventilated area with the parking brake applied and the transmission in park or neutral. The ignition must be in the ON position (engine not running) for most configuration changes. Connect your VCI to the vehicle's OBD-II port and to your laptop via USB or WiFi depending on your interface type.
Step 2: Establish Communication and Read Current Configuration
Launch your diagnostic software and identify the vehicle using the VIN. Allow the software to complete a full module scan, which builds a network map of all connected electronic control units. This scan typically takes between two and five minutes depending on the vehicle's architecture complexity.
Once the scan is complete, navigate to the module that controls the feature you wish to activate. For most comfort and convenience features, this will be the Body Control Module (BCM) or Central Junction Box (CJB). Read the current configuration file and save a backup copy to your laptop before making any changes. This backup is your safety net if anything goes wrong.
Step 3: Modify the Configuration
Using the CCF Editor or the built-in configuration tools within your diagnostic software, locate the parameter that controls the target feature. The parameter names vary by vehicle but are generally descriptive, such as "Comfort Access Enable," "Auto Lock Speed Threshold," or "Ambient Lighting Profile."
Change the parameter value from disabled to enabled, or from the default setting to the desired custom value. Be careful not to modify unrelated parameters, as incorrect changes can cause unexpected behaviour in other systems. If you are unsure about a parameter, consult the technical documentation or contact our remote support team for guidance.
Step 4: Write the Changes to the Vehicle
After verifying that your configuration changes are correct, write the modified file back to the target module. The software will display a progress bar and confirm when the write is complete. Do not disconnect the VCI or turn off the ignition during this process, as an interrupted write can corrupt the module and require dealer-level recovery procedures.
For some features, particularly those involving online programming, you may need to authenticate with TOPIX Cloud before the write is accepted. Ensure your TOPIX subscription is active and that the vehicle has a stable connection through your VCI interface if WiFi programming is being used.
Step 5: Test and Verify
Once the write is confirmed, cycle the ignition off and wait for thirty seconds to allow all modules to power down completely. Then switch the ignition back on and test the newly activated feature thoroughly. For comfort access, test the proximity unlock and touch-to-lock functions from multiple angles. For lighting changes, verify that all zones and colours respond correctly across different drive modes.
If the feature does not work as expected, there are several common causes to investigate. The vehicle may lack supporting hardware (e.g., missing proximity sensors or LED strips). Another module may need to be configured in addition to the primary target. Or the parameter may have been written to the wrong module address. In these cases, restore your backup configuration and contact our support team for expert troubleshooting assistance.
Vehicle-Specific Notes
Different JLR vehicles have unique electronic architectures, and what works on one model may require a different approach on another. The following notes cover the most important considerations for the popular vehicles in our customer base.
Defender (L663)
The L663 Defender runs on the latest JLR electrical architecture and requires Pathfinder for all configuration work. The BCM is particularly well-configured for feature activation, and we regularly enable comfort access, auto-fold mirrors, and custom terrain response modes for Defender owners. The infotainment system in the Defender also supports hidden engineering menus that can be useful for advanced diagnostics.
Range Rover (L460)
The L460 Range Rover and L461 Range Rover Sport represent the pinnacle of JLR's current technology. These vehicles have extensive ambient lighting capabilities that are often restricted from the factory. We frequently activate the full ambient lighting suite, additional driver memory profiles, and wireless CarPlay for these models. The PCM and TCM in these vehicles also support custom drive mode configurations that transform the driving experience.
Discovery (L462)
The Discovery L462 shares much of its architecture with the Range Rover Sport and is similarly capable of feature activation. Common requests include auto-fold mirrors, auto door lock, and terrain response enhancements. The Discovery's family-oriented customer base particularly appreciates the convenience features like window-close-on-lock and enhanced ambient lighting for the cabin.
Jaguar F-PACE / I-PACE
Jaguar vehicles use the same diagnostic tools but with model-specific CCF parameters. The F-PACE responds well to comfort access activation, auto-fold mirror configuration, and infotainment menu unlocking. The I-PACE, being a fully electric vehicle, has additional EV-specific modules that can be configured for charging behaviour, energy recuperation settings, and cabin preconditioning schedules.
Safety Considerations
While CAN activation is a safe and legitimate procedure when performed correctly, there are important safety considerations that every technician should understand before offering these services to customers.
First, always create a backup of the original configuration before making any changes. A backup allows you to restore the vehicle to its factory state if something goes wrong. Store backups securely and label them clearly with the vehicle VIN and date.
Second, never attempt to activate features that require hardware that is not present in the vehicle. For example, enabling comfort access on a vehicle without proximity sensors will not work and may cause error codes. Similarly, activating ambient lighting profiles on vehicles without the LED hardware will not produce any visible result and may confuse the customer.
Third, be transparent with customers about warranty implications. While CAN activation using genuine OEM tools is not the same as unauthorised tuning, some vehicle warranties may be affected by configuration changes. We recommend advising customers to check with their vehicle insurer or warranty provider if they have concerns. At SX-CAN, we provide a clear service agreement for all activation work that outlines what was changed and how it can be reversed.
Fourth, ensure your diagnostic tools are properly licensed and updated. Using outdated software or unofficial tools can cause module compatibility issues and may leave the vehicle in an unstable state. We only recommend genuine JLR diagnostic software and regularly updated VCI interfaces for all activation work.
Frequently Asked Questions
Feature activation is possible on most JLR vehicles from 2010 onwards, but the exact features available depend on the vehicle's electronic architecture, module configuration, and supporting hardware. Pre-2010 vehicles typically have simpler electronics and fewer activation opportunities. Modern vehicles from 2017+ have the widest range of activatable features. We recommend checking your specific VIN with our team before booking an activation service to confirm what is possible.
CAN activation using genuine OEM software is a configuration change rather than a hardware modification or unauthorised tune. However, warranty policies vary between dealers and warranty providers. Some franchised dealers may flag configuration changes during service visits, while others will not. We provide a detailed service record of all changes made, and we can restore factory settings if required. We recommend discussing warranty concerns with your provider before proceeding.
Most single-feature activations take between 30 minutes and 2 hours depending on the vehicle and the complexity of the feature. Multi-feature packages or vehicles requiring online programming through TOPIX Cloud may take longer. Remote activation services, where we connect to your vehicle over the internet, typically take the same amount of time as in-person work but save you the travel inconvenience.
Yes, provided you have the correct diagnostic software, a compatible VCI interface, and the technical knowledge to use them safely. We supply complete DIY kits that include software, hardware, and comprehensive guides. For those who prefer professional assistance, our remote activation service allows our engineers to perform the work while you relax at home. We also offer training sessions for workshops that want to bring CAN activation in-house.
Conclusion
JLR CAN activation is one of the most rewarding services that an independent workshop can offer. It requires minimal hardware investment, adds genuine value for customers, and differentiates your business from competitors who only offer basic maintenance and repair. With the right tools, proper training, and a safety-first approach, you can unlock the full potential of every JLR vehicle that enters your workshop.
At SX-CAN, we are committed to making dealer-level diagnostics accessible to independent professionals. Whether you need software, hardware, training, or direct activation services, we have the expertise and products to support your journey. Browse our diagnostic tools or activation services to get started today.