Range Rover coding is one of the most rewarding skills a technician or enthusiast can develop. Whether you want to unlock hidden features, retrofit new hardware, or simply understand how your vehicle's electronic systems communicate, learning the basics of module programming opens a world of possibilities. This guide is designed for beginners. It assumes no prior knowledge of JLR diagnostics and walks you through the fundamental concepts, tools, and techniques required to code your Range Rover safely and confidently.
What Is Module Coding?
Modern Range Rovers are essentially computers on wheels. Every major component, from the engine control module (ECM) to the door control units, contains a microprocessor that runs software. This software determines how the component behaves, what features are available, and how it interacts with other modules on the vehicle network.
Coding is the process of modifying the configuration data stored in these modules to change their behaviour. Unlike mechanical modifications, coding does not require physical parts. You are simply updating the software parameters that tell the vehicle what hardware is fitted and what features should be active.
For example, if your Range Rover has the hardware for heated seats but the feature is disabled in the software, coding can activate it. If you retrofit a tow bar, coding tells the vehicle's control systems that a trailer module is now present, enabling the trailer stability programme. If you want the wing mirrors to dip when reversing, coding makes that possible.
Coding is distinct from programming. Programming involves writing entirely new software (firmware) to a module, usually to fix bugs or update functionality. Coding changes only the configuration parameters within that existing software. For the purposes of this guide, we will focus on coding, as it is the safer and more accessible starting point for beginners.
Tools You Need
Before you can code anything, you need the right tools. Using incorrect or counterfeit equipment can damage your vehicle's electronics or produce unreliable results. The following is a list of genuine tools we recommend.
Diagnostic Software
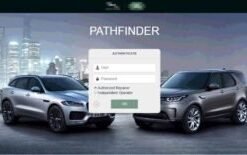
The two primary diagnostic applications for JLR vehicles are Pathfinder and SDD (Symptom Driven Diagnostics). Pathfinder is the newer tool, used for all current models including the L460 Range Rover and L461 Range Rover Sport. SDD is the legacy tool, still useful for older vehicles (pre-2017) but increasingly obsolete for modern platforms.
For Range Rover coding, we strongly recommend JLR Pathfinder. It provides the most intuitive interface for configuration changes and is the only tool supported for online programming via TOPIX Cloud. Pathfinder also includes guided service functions that reduce the risk of user error.
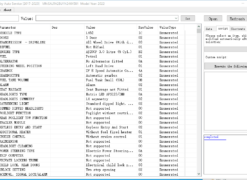
The CCF Editor is a complementary tool that allows direct editing of the Car Configuration File. It is particularly useful for batch changes or for features that are not exposed through Pathfinder's guided menus. The CCF Editor is available as a standalone product or as part of our software bundle.
Hardware Interface
You need a compatible diagnostic interface to connect your laptop to the vehicle's OBD-II port. The standard interface for modern JLR vehicles is a DoIP VCI (Diagnostics over Internet Protocol Vehicle Communication Interface).
We offer two recommended options:
- DA-DoIP VCI: A reliable, cost-effective interface that supports DoIP and J2534 protocols. Priced at £199, it is the best choice for most independent workshops and enthusiasts.
- JLR DoIP VCI (Wi-Fi): The official JLR interface with wireless connectivity. At £279, it offers the convenience of Wi-Fi but performs identically to the DA-DoIP for most coding tasks.
Both interfaces require driver installation and must be connected to the vehicle before launching the diagnostic software.
Laptop and Power Supply
A Windows 10 or 11 laptop is mandatory. macOS and Linux are not supported. Minimum specifications are an Intel Core i5 processor, 8 GB RAM, and a 256 GB SSD. For professional use, we recommend a Panasonic Toughbook CF-54, which is supplied by SX-CAN pre-configured with all JLR software.
A stable 12V battery charger is not optional. During coding, the ignition is on for extended periods, which drains the battery. A voltage drop below 12.0V during a write operation can corrupt a module and render it unresponsive. Use a regulated charger set to 13.5V and capable of delivering at least 20 amps.
Common Coding Changes
The following are the most frequently requested coding changes for Range Rover models. These are popular because they enhance the ownership experience without requiring expensive hardware retrofits.
Comfort and Convenience
- Comfort Access (Keyless Entry): Enables passive entry and walk-away locking when the key is in proximity. Requires keyless door handles to be fitted.
- Auto-Lock on Drive-Away: Locks all doors automatically when the vehicle reaches a set speed. Can be configured to 5 mph, 10 mph, or 15 mph.
- Auto-Unlock on Ignition Off: Unlocks doors when the engine is switched off. Some owners disable this for security reasons.
- Mirror Dip on Reverse: Tilts the passenger wing mirror down to show the kerb when the vehicle is in reverse gear.
- Approach Lighting: Illuminates the ground around the vehicle when the key is detected nearby. Requires puddle lamps in the mirrors.
- Window Close from Key Fob: Closes all windows and the sunroof by holding the lock button on the remote.
Lighting and Visibility
- Ambient Lighting Expansion: Unlocks additional colours and brightness zones in the interior lighting system.
- Auto High Beam Assist: Automatically switches between high and low beam based on oncoming traffic. Requires LED matrix headlights.
- Daytime Running Light Brightness: Adjusts the intensity of DRLs to comply with local regulations or personal preference.
Driver Assistance
- Lane Keep Assist: Activates the steering intervention that keeps the vehicle centred in its lane. Requires the front-facing camera.
- Traffic Sign Recognition: Displays speed limits and overtaking restrictions in the instrument cluster.
- Adaptive Cruise Control Gap: Adjusts the default following distance for the adaptive cruise system.
Infotainment
- Apple CarPlay / Android Auto: Activates smartphone mirroring if the hardware module is present but disabled.
- Wireless Phone Charging: Enables the Qi charging pad in the centre console.
- Rear Entertainment System: Activates the rear screens and headphone controls on models with the hardware fitted.
Step-by-Step Coding Guide
Now that you understand the concepts and tools, here is the actual process for making a coding change on your Range Rover. We will use the example of enabling auto-lock on drive-away, but the same general steps apply to almost any coding task.
Step 1: Back Up the Original Configuration
This is the single most important step. Before changing anything, create a complete backup of your vehicle's current CCF and, if possible, individual module configurations.
- Connect your DoIP VCI to the vehicle and laptop.
- Launch the CCF Editor and read the current configuration from the vehicle.
- Save the file to your laptop with a descriptive name, such as
Range_Rover_VIN_Backup_2026-07-02.ccf. - Store this backup in a safe location, preferably on an external drive or cloud storage. If the worst happens, this file is your only way back to the factory state.
Step 2: Connect to the Vehicle
- Connect the battery charger and set it to 13.5V.
- Plug the DoIP VCI into the OBD-II port (located beneath the dashboard, driver's side).
- Connect the VCI to your laptop via USB or Ethernet.
- Close all doors, the boot, and the bonnet.
- Switch the ignition to the "on" position (engine off).
- Launch Pathfinder and start a new diagnostic session.
- Allow Pathfinder to identify the vehicle automatically from the VIN.
Step 3: Identify the Target Module
Each feature is controlled by a specific module. For auto-lock on drive-away, the relevant module is the BCM (Body Control Module). In Pathfinder, navigate to the vehicle topology view, locate the BCM, and select it.
If you are unsure which module controls a particular feature, consult the Pathfinder help documentation or search the module list for keywords. Alternatively, our remote support team can advise you on the correct module for any coding change.
Step 4: Make the Coding Change
Within the BCM module menu, select "Service Functions" or "Configuration." Look for the option labelled "Auto Lock" or "Speed-Dependent Locking." Toggle this setting from "Disabled" to "Enabled." Pathfinder may also allow you to set the speed threshold; 10 mph is the most common choice.
When using the CCF Editor, the process is more direct. You open the CCF file, navigate to the BCM section, find the auto-lock parameter, and change its value. The CCF Editor provides a raw view of the configuration data, so you must be precise. Always double-check the parameter name before writing.
Step 5: Write and Verify
Once you have made the change, write the new configuration to the vehicle. Pathfinder will prompt you to confirm the write operation. Review the summary carefully; if anything looks incorrect, cancel and start again.
After the write completes successfully:
- Switch the ignition off and wait for 60 seconds. This allows the modules to reset.
- Switch the ignition back on.
- Test the feature by driving the vehicle above the threshold speed. The doors should lock automatically.
- Check for new fault codes using Pathfinder's DTC scan function. If any codes appear, clear them and retest.
If the feature does not work, check that you modified the correct module and parameter. Some features require changes in multiple modules to function fully.
Safety Considerations
Coding is safe when performed correctly, but it is not without risk. The following guidelines will help you avoid the most common mistakes.
Always Back Up
We cannot stress this enough. Every coding session must begin with a backup. Never assume that you can "remember" the original settings. Module configurations contain hundreds of parameters, and manual restoration is virtually impossible without a backup file.
Use Genuine Tools
Counterfeit or cloned diagnostic interfaces are widely available online at suspiciously low prices. These devices often have outdated firmware, poor build quality, and unreliable drivers. In the worst case, a faulty VCI can send incorrect voltage signals to the vehicle's CAN bus and damage expensive modules. Always buy genuine tools from a reputable supplier like SX-CAN.
Maintain Stable Power
Battery voltage must remain above 12.5V throughout the coding session. If you do not have a workshop charger, invest in one. The cost of a good charger is far less than the cost of replacing a corrupted ECM.
Do Not Rush
Coding is not a race. Take your time to read each prompt, verify each setting, and confirm each write. Interrupting a write operation by closing the laptop lid or disconnecting the VCI is one of the most common causes of module failure.
Know When to Seek Help
If you are unsure about a coding change, ask for assistance. Our remote support and activation services connect you with experienced JLR technicians who can guide you through the process or perform the coding on your behalf. There is no shame in asking for help; a single mistake can cost thousands of pounds to rectify.
FAQs
Can I damage my Range Rover by coding it incorrectly?
Yes, but the risk is low if you follow the correct procedures. The most serious risk is interrupting a write operation, which can leave a module in a corrupted state. Always maintain stable power and internet connections, and never disconnect the VCI during a write. With a proper backup, most mistakes are reversible.
Do I need TOPIX Cloud for coding?
Not for most coding tasks. Basic configuration changes can be performed offline using Pathfinder or the CCF Editor. However, features that require online programming, such as enabling Apple CarPlay or updating module firmware, do require an active TOPIX Cloud subscription.
What is the difference between coding and programming?
Coding changes the configuration parameters within a module's existing software. Programming writes entirely new software (firmware) to the module. Coding is generally safer and faster. Programming is required for software updates, module replacements, and certain complex activations.
Which Range Rover models can be coded?
Almost all modern Range Rovers can be coded, including the L460 (2022+), L405 (2013-2021), L322 (2002-2012), and Range Rover Sport models. The exact tools and methods vary by generation. Visit our Range Rover vehicle page for model-specific guidance.
How do I know if a feature is available on my vehicle?
Check the hardware. If the physical components (e.g., door sensors, cameras, LED modules) are fitted, the feature can almost certainly be activated via coding. If the hardware is missing, coding alone cannot add the feature. Our technical team can help you determine hardware compatibility from your VIN.
Conclusion
Range Rover coding is an accessible and rewarding skill that allows you to unlock the full potential of your vehicle. With the right tools, a methodical approach, and a healthy respect for the risks, even a beginner can safely activate hidden features and customise their vehicle to their exact preferences.
At SX-CAN, we are committed to making JLR diagnostics accessible to independent workshops and enthusiasts alike. Whether you need CCF-PRO, a DA-DoIP VCI, or expert guidance through our remote support service, we are here to help. For more information about Range Rover-specific tools, visit our Range Rover vehicle page or contact us directly.